Fix ISP DNS Hijacking with DD-WRT

Ars Technica recently wrote up an article ISPs hijacking DNS requests to watch web searches. A couple years ago, I discovered that any time that I punched in an invalid domain name, instead of telling me the domain name did not exist, I was redirected to a search page. The search page had an opt out feature, but it reset after a few hours. I wrote a script to automatically opt myself out every few hours, but it was ineffective. When I called CenturyLink (my ISP) about this problem, they first denied it. After arguing with the representative for a while, he eventually informed me that this was how the feature was supposed to work. I asked him how that could be useful if the opt out really wasn’t an opt out. He didn’t have an answer. Eventually I opted to use alternative DNS. However, one solution for those of us running DD-WRT on our routers is to add additional DNSMasq options. While OpenDNS does honor opt outs, I still add the IP addresses they use to my configuration.

Before adding anything, pinging an invalid domain shows:

ping garbage.invalidtld
PING garbage.invalidtld (67.215.65.132) 56(84) bytes of data.
64 bytes from hit-nxdomain.opendns.com (67.215.65.132): icmp_req=1 ttl=56 time=54.4 ms

I went into the Services page of DD-WRT and added the following to the “Additional DNSMasq Options” section:

bogus-nxdomain=67.215.65.132
bogus-nxdomain=184.106.31.182

Now the same command returns the proper response:

ping garbage.invalidtld
ping: unknown host garbage.invalidtld

I could have applied the same method to filter CenturyLink’s DNS responses, but I have been happier with OpenDNS and decided not to switch back.
OpenVPN on Mac OS X

I have been using Tunnelblick to connect to the VPN I have configured on my Linksys WRT54GL router running DD-WRT. DD-WRT provides several different tutorials for configuring OpenVPN on your router. Tunnelblick works fairly well on my laptop running Mac OS X most of the time, but every now and then I have had issues connecting. Therefore, I decided to investigate alternatives.

I decided to try some variation of what was described in this post on Tony’s Cafe. The first step was to install the TunTap driver for Mac OS X. This provides the necessary network interfaces to connect to an OpenVPN. It appears that a reboot is no longer required. For command line simplicity and for scripting purposes, you can use the following to install the TunTap driver.

cd /tmp/
curl -O http://superb-east.dl.sourceforge.net/sourceforge/tuntaposx/tuntap_20080804.tar.gz
tar xzvf tuntap_20080804.tar.gz
installer -verbose -pkg tuntap_20080804.pkg -target /
rm -Rf tuntap*

The post on Tony’s Cafe then shows the steps necessary to build OpenVPN from source. You are welcome to do this and you can check it out in the post. However, the simply way is to make use the openvpn binary inside of the Tunnelblick application package. I simply copied it out of the .app and into /usr/sbin. The following again automates the entire process for installing the openvpn binary.

cd /tmp/
curl -O http://tunnelblick.googlecode.com/files/Tunnelblick_3.0b10.dmg
hdiutil attach Tunnelblick_3.0b10.dmg
cp /Volumes/Tunnelblick/Tunnelblick.app/Contents/Resources/openvpn \
    /usr/sbin/openvpn
hdiutil detach $( df | grep Tunnelblick | awk '{print $1}' )
rm -Rf Tunnelblick*

I then created a new OpenVPN configuration file using the example provided in the referenced Tony’s Cafe post. The example I used is provided below.

client
dev tap0
# In the next line, specify the IP address and subnet mask of the tap0 device
ifconfig [IP Address] [Subnet Mask]
proto udp
remote [OpenVPN Server DNS Address] [port]
resolv-retry infinite
# Downgrade privileges after initialization (non-Windows only)
user nobody
group nobody
persist-key
persist-tun
;http-proxy-retry # retry on connection failures
;http-proxy [proxy server] [proxy port #]
mute-replay-warnings
# If using SSL Certificates, use the following 3 lines:
ca /etc/openvpn/ca.crt
cert /etc/openvpn/client.crt
key /etc/openvpn/client.key
# If using a SSL static key, use the following line:
secret “/etc/openvpn/vpn.key”
# Use the next line if utilizing LZO compression:
comp-lzo
verb 3
mute 20

I then plugged in the host to connect to, the IP address and subnet mask for my laptop to use while it is on the road, and the path to the certificates and keys stored on my machine. All that was left was to launch OpenVPN from the command line:

/usr/local/sbin/openvpn --config /path/to/openvpn.conf

I haven’t used this new method of connecting to my VPN extensively; however, so far it appears to be working well.

April Fools Prank

Inspired by Upside-Down-Ternet, I decided to get two of my housemates back for the Tabasco and Whiskey shot that they gave me when we went out for my birthday. Flipping all of the images upside down was a little too subtle though. I prefer the all-out, in-your-face kind of April Fools revenge prank.

It turns out all I had to do was find the IP addresses for my housemates’ computers, create the awesome pwned page, and issue two commands on my DD-WRT router:

root@Madrona:~# iptables -t nat -I PREROUTING -s 192.168.1.187 -p tcp -j DNAT --to-destination 192.168.1.42
root@Madrona:~# iptables -t nat -I PREROUTING -s 192.168.1.190 -p tcp -j DNAT --to-destination 192.168.1.42

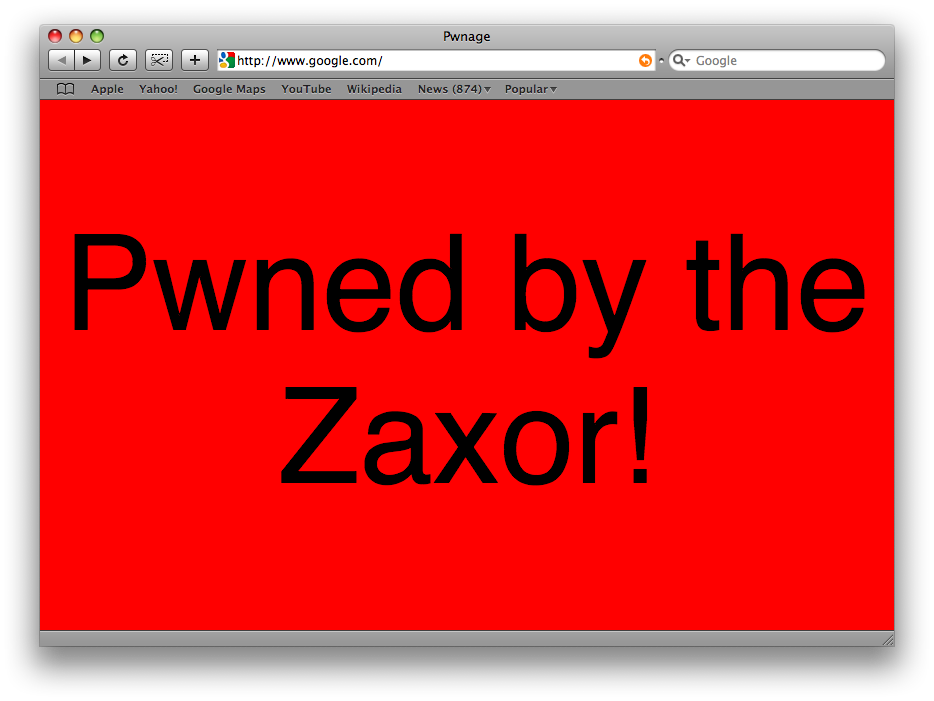
When those two housemates went to check Facebook (or any site) this morning, they were greeted with this instead:

Pwned by the Zaxor!
Pwned by the Zaxor!

Their reactions made it worth it. Tyler said, “Pwned? What is pwned?” David said, “What the hell is a Zaxor?”

Even though I downed the entire Tabasco and Whiskey shot, let this be a lesson that I always take my revenge convey my thanks in kind.